Pierogi arelittle semicircular parcels of pasta which are made with a multitude of fillings.
Even though I make these myself, it is the dish I always crave when I go to Poland.
There are several theories as to how pasta style dishes came into Poland.
The general word for pasta especially noodles is makaron , which certainly has its roots in Italian; and as Italian cooking has influenced Polish cooking from the 16th century I used to think that was where the dishes originated. I find it amusing that ravioli in Polish are called pierogi włoskie (Italian pierogi).
After doing some research it seems however that pierogi were around in Poland in the middle ages, they are mentioned in the 13th century and the name comes from an old Slav word for feast or festivity.
Many people believe that they came to Poland from the Far East through Siberia and Russia.
When I was in China in the 1990s, imagine my surprise when I was on several occasions offered dishes which were called Jiaoxi (dumplings) and they were exactly the same shape and size as pierogi and cooked in the same way!
Whatever the origins, the Poles have made pierogi their own; there are lots of traditional fillings, both savoury and sweet, and several ways of serving them.
In a pierogi cookery book I bought in Poland there are around 40 traditional ones and more than 20 new style ones. In a pierogi restaurant I went to in Kraków there were around 30 options on the menu.
Home-made pierogi
Pierogi
Pierogi are made from a thinly rolled out dough using a circular cutter, about 7 cm in diameter, we used to use a medium sized wine glass. A largish teaspoon of the filling is placed on the circle and this is then folded in half and the edges pinched together to seal them – this is done to give them a slightly crimped edge.
You learn from experience how much filling to put into the pierogi as too much will make it hard to seal them and if not properly sealed they will burst on boiling. Do not worry if you have a few mishaps – it still happens to me even with experience – it is hard to salvage one that has gone wrong – just accept that there will be a few that you do not cook.
Pierogi Dough
Pierogi dough is made from flour, egg and water and I have seen many variations of the recipe. The following is my mother’s and I think it is the best I have ever used and tasted.
She never used whole eggs, just the yolks and this gives a dough which is soft and not tough and can be easily rolled out. The recipes which use whole eggs give a tougher dough which is much harder to roll out.
My mother originally used plain flour and added a tablespoon or two of fine semolina but now that strong flour or even pasta flour is readily available this is what I use the most.
Another point is that flour does vary and it is possible to add more flour to the dough as you are mixing it but you cannot add more liquid if it is too dry!
As you mix the ingredients in the first few minutes you should be able to tell if it will be too dry and you can add some more water initially but once it is all mixed together you cannot – if it goes wrong – just start again.
The quantities that I have given work well and but you should allow for extra flour if needed.
Ingredients
500g pasta flour or strong flour or plain flour & 2 tablespoons of fine semolina
300 ml water
1 tablespoon oil – sunflower or light olive
½ teaspoon salt
2 egg yolks
Method
In a jug or bowl mix together the water, oil and yolks.
Put the flour and salt into a large bowl and make a well in the centre.
Pour the liquid mixture into the well and then with your hands incorporate the flour into the liquid until you have a large ball of dough.
Turn this out into a floured board and knead the dough for a few minutes until it is a smooth ball.
You can then use the dough straight away, cutting it into 4 quarters and rolling out a quarter at a time on a floured surface until the dough is thin. You can pull it out a bit at the beginning to give a more rectangular shape of even thickness.
You can cover the dough with a cloth and place it in the fridge till needed.
You can freeze the dough for a few days for later use, it is best to cut it into quarters and wrap these in cling film or plastic and place these in another bag or container.
Shaping The Pierogi
Rolled out the dough until it is thin and use a circular cutter, about 7cm in diameter, to make lots of circles. You can re-roll the cuttings to make more circles until all the dough is used.
A largish teaspoon of the filling is placed on to the dough circle and this is then folded in half and the edges pinched using your thumb and first finger to seal them – giving them a slightly crimped edge.
This quality of dough will make about 70 to 80 pierogi – depends on how thinly you roll the dough and the size of your cutter.
You can open freeze pierogi so sometimes I make a batch and open freeze half of them – then store them in a plastic box. They should be cooked from frozen just allowing a little extra time.
Pierogi Fillings
The quantities that I have given should be enough for the 500g batch of dough. Many of the fillings once made can be frozen; I sometimes make the mixture and freeze it in 2 to 3 small batches for later use.
A good tip is not to make the filling too moist, as any liquid on the dough will prevent you getting a good seal.
Have a large surface such as a tray covered with a cotton or linen cloth which has been lightly floured ready and place the sealed pierogi on this until they are all made, do not let then touch each other.
Cooking The Pierogi
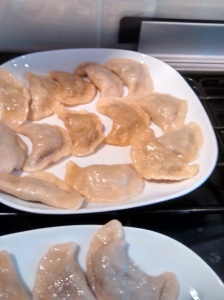
To cook the pierogi, use a large pan of boiling water to which you have added some salt and a drizzle of oil. Drop the pierogi in one by one and allow them to boil. I usually do about 6 to 8 at a time (I only do 6 at a time if using frozen ones). As they cook they will float to the surface, let them boil for 2 to 3 minutes, a bit more if they were frozen, and then remove them with a slotted or perforated spoon and put into a colander above a pan for a few seconds to drain and serve. Continue boiling batches in the same water.
Serving Suggestion
Traditionally savoury pierogi are served with melted butter, skwarki – crispy smoked bacon bits, small pieces of fried onion or melted butter and dried breadcrumbs (à la Polonaise).
If you want to make all the pierogi to serve together then you need to get a large shallow dish and put the melted butter or skwarki or fried onions into the dish and keep the dish warm in a low oven. As you take out the cooked pierogi add them to the dish, mix them with the butter, skwarki or onions to prevent them sticking. Keep on adding more as they cook and keep shaking the dish to coat and mix them.
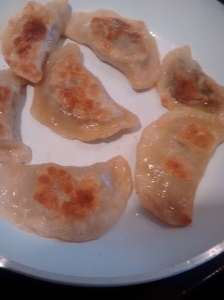
Once your have had your meal and you have any left (I leave some deliberately) then they are wonderful fried up later. You need a hot frying pan and should be able to just use the butter etc that they are coated in, maybe adding a little extra oil if needed. Fry them till the dough is golden and crispy.
Tip – spread out the cooked and coated pierogi for later frying to prevent them sticking
Savoury Fillings
Below are some of my favourite fillings.
All the filling must be allowed to cooled before using them – you can make these in advance – even the day before.
Sauerkraut & Mushroom
These is often served at Wigilia – the Christmas Eve meal
Ingredients
Approx 500g of sauerkraut (I used to get small jars but have not seen these lately – use part of a large jar – use the rest for something else)
20- 30g dried mushrooms.
1 onion
1 bay leaf
Ground black pepper to taste
Method
Put the mushrooms in a small bowl and cover them with boiling water and leave them overnight.
Strain the mushrooms but keep the liquid and then chop the mushrooms into small pieces.
Strain the sauerkraut but keep the liquid and chop the sauerkraut into small pieces.
Put the sauerkraut with the liquid from the tin or jar into a pan and cover with boiling water. Add some of liquid from the soaked mushrooms and the bay leaf.
Cover the pan and boil the sauerkraut gently for about 30 minutes. Then uncover and boil off as much of the liquid as possible – without burning the sauerkraut.
Allow the boiled sauerkraut to cool and remove the bay leaf. Strain it using a sieve and pressing it down with a spoon to get the mixture as dry as possible (If you want you can put the strained mixture into a clean dry cotton or linen teacloth, twist the ends together to squeeze it to get it really dry).
Whilst the sauerkraut is cooking heat the chopped mushrooms gently in a small pan with the rest of the liquor, stirring to prevent it burning but reducing as much of the possible.
Chop the onion finely and fry it till it is soft and golden and add this to the mushroom mixture and mix it well together.
Mix the sauerkraut, mushrooms and onions together and add some ground black pepper to taste; salt should not be necessary.
Note
If your sauerkraut is very sour, you can add a little sugar to the mixture or you can put it into a sieve or colander and wash it for a few minutes in cold water before you start cooking it – you might want to add a little salt at the end if you use this method – taste and see)
Peel and boil the potatoes in salted water, strain and mash, then leave to cool.
Chop the onion finely and fry it till it is soft and golden, allow it to cool.
Mix together thoroughly, the potatoes, onions, cheese and egg yolk.
Add salt and pepper to taste.
Cheese 2
When my mother did not have any curd cheese, she used Lancashire cheese, as that was the cheese most readily available to her. Both versions taste good, the secret with this one is to grate the cheese as finely as possible and mix it in well.
Ingredients
400g floury potatoes
1 onion
200g white crumbly cheese such as Lancashire
1 egg yolk
butter & oil to fry the onion
salt & ground black pepper to taste
Method
Peel and boil the potatoes in salted water, strain and mash, then leave to cool.
Chop the onion finely and fry it till it is soft and golden, allow it to cool.
Grate the cheese as finely as possible.
Mix together thoroughly, the potatoes, onions, cheese and egg yolk.
Add salt and pepper to taste.
Note
My mother would boil extra potatoes on one day and save some to make these fillings the next.
In Poland you may see these savoury cheese ones on a menu as Pierogi ruskie – that is Ruthanian pierogi – from the old word for the Ukraine
Pork
Ingredients
300g shoulder or spare rib pork
1 onion
1 egg yolk
1 tablespoon of dried breadcrumbs
approx 250 ml of chicken stock – can be from stock cubes
butter & oil to fry the onion
salt & ground black pepper to taste
Method
Pre heat the oven to GM 3 – 1600C
Put the pork into a small casserole dish and cover it with the stock and put on the lid.
Put the dish in the oven for at least 1 hour, depending on the meat you might need longer.
I cook the meat until it is tender and can be broken up with a fork and most of the liquid has been absorbed. Allow the meat to cool. You can mince the meat but I find that if you cook it long enough you do not need to, you can just chop it with a sharp knife .
Chop the onion finely and fry it till it is soft and golden, allow it to cool.
Mix thoroughly together: the meat, onion, yolk and breadcrumbs and then add salt and pepper to taste.
Chicken
You can cook a piece of breast chicken as for the pork filling, however neither my mother or myself ever did this; we used leftover roast chicken from a roast dinner.
Ingredients
300g of roast chicken
1 onion
1 egg yolk
1 slice of white bread
small amount of milk
butter & oil to fry the onion
salt & ground black pepper to taste
Method
Take the slice of bread and remove the crusts removed and leave this for half an hour in a bowl with a little milk – do not use the excess milk just the wet slightly squeezed bread.
Finely chop or mince the chicken.
Mix together the chicken, onion, egg yolk and bread to get a uniform mixture.
Sweet Fillings
The dough and method of making sweet pierogi is just the same as for the savoury ones.
Once boiled sweet pierogi are dredged with icing or caster sugar and are often served with soured cream. They are best eaten straight away.
I must admit that when I was younger I did not really like sweet pierogi but now I think they are utterly delicious especially when with soured cream.
Sweet Cheese 1
Ingredients
200g curd cheese/twaróg or yoghurt cheese
40g caster sugar
1 egg yolk
2 drops of vanilla essence
tiny pinch of salt
Method
Thoroughly mix all the ingredients together.
Sweet Cheese 2
Ingredients
250g curd cheese/twaróg or yoghurt cheese
40g caster sugar
2-3 tablespoons of soured cream
tiny pinch of salt
Method
Thoroughly mix all the ingredients together.
Red Fruits
In the summer in Poland, when all the fruits of the forests and the garden are ripe, that is when these pierogi are at their best. However bottled fruit is available all year round and I often make my sweet pierogi with these.
The following fruits are traditionally used –
Morello Cherries
Blackberries
Whinberries (bilberries) these grew in Lancashire near my home and also could be bought in baskets imported from Poland. (I think the larger American Blueberry is nowhere near as tasty.) When we went to pick these I know this always made my mother think of her childhood in Poland.
I tend to use half the amount of dough when making these fruit ones as they do not freeze well with fruit.
Depending on the size of the fruit, you need about 3 or 4 per circle.
Do not add sugar to fresh fruit as this will make too much liquid and the pierogi will not seal.
If using bottled fruit you need to strain as much juice away as possible.
Drenched the cooked pierogi in icing sugar and serve with sour cream. The sugar contrasts with tartness of the fruit.
A Variation ….
Knedle – Dumplings – With Plums
To me these are sweet pierogi – but I have been assured by my aunties in Poland – who made them for me on my last visit – that because of their shape – round balls – these are always called knedle.
The dough is just the same as for pierogi and they are boiled in just the same way but will take a bit longer to cook depending on the size of the plums.
Serve them dusted with icing sugar and serve with soured cream.
Plum Filling
500g fresh plums – small ones are best for the round shape & sugar – you will need about a half a teaspoon per plum.
Wash and dry the plums and remove the stalks. If the plums are small then use whole ones and if they are large use a sharp knife to cut them in half and remove the stone.
Cut strips of dough more than twice the size of the plum or plum half. Place the plum on one side and sprinkle with the sugar.
Fold over the other part of the dough and seal the edges well with your fingers – take care as the added sugar produces liquid – use excess dough to give a good seal then cut away the excess dough to give a more rounded shape.
Uszka
Uszka – means ‘little ears’ and they are much smaller and a different shape than pierogi and are always savoury.
They are made from squares of dough, about 4cm square. Half a teaspoon of filling is placed onto the square and then it is folded into a triangle and the edges sealed. The two ends at the folded side of the triangle are brought together and then pinched together giving a shape which is slightly rounded triangle with a pointed part, looking like a little ear.
When you have rolled out the dough until it is thin you cut the dough into squares no more than 4cm square. I used to use a sharp knife but have now found that using a pizza wheel to cut the dough is much easier. There is little waste dough with each rolling but you can still use all the scrapes to make one last batch.
The quality of dough will make about 150 and because of this I often only make half quantities – using 250g of flour, 150ml of water, 1 egg yolk and half a tablespoon of oil. (Except at Wigilia – the Christmas Eve meal, when I make the full amount)
The uszka are boiled in just the same way as pierogi, they are usually ready when they float to the surface.
The most traditional fillings are mushroom – see below – and Sauerkraut & Mushroom.
Uszka can be served just as pierogi with melted butter or they can be served floating in a clear soup such as rosól – clear chicken soup or in barszcz – beetroot soup.
Traditionally mushroom uszka are made for Wigila – the Christmas Eve meal either on their own with butter or served floating in barszcz (clear beetroot soup).
Mushroom Filling
In Poland these will have been made with just dried mushrooms, here in England my mother made them with fresh mushrooms with the addition of dried mushrooms when she could get them. I like them like this the best.
Ingredients
250g mushrooms – older open ones are better than button mushrooms.
Pour a small amount of boiling water into the dried mushrooms and leave these overnight.
You can remove the stalks from the older fresh mushrooms as these tend to be ‘woody’ and then cut them into thin slices.
Chop the onion into small pieces.
Fry the mushrooms and onions together in the butter. It does depend on the mushrooms and the way they are fried as to how much liquid is produced, if you get a lot, then let them simmer gently to evaporate as much as possible or strain some of this excess off (you can use this liquor in soups or sauces).
Allow the mixture to cool.
Chop the reconstituted dried mushroom (again you can save the liquor for other recipes) and add these to the mixture.
The mixture then needs to be minced which used to take me a long time and much effort. I now use a hand blender which works really well taking care not to liquidise it too much.
To the minced mixture add the egg yolk and then enough breadcrumbs to make a stiff filling.
Add salt and lots of ground black pepper.
Cut the dough into quarters
On a floured board roll out each piece until it is thin.
Using a sharp knife or pizza wheel cut the dough into 4cm squares (they can be smaller but they are harder to work).
Fold over each piece to form a triangle and pinch the edges together with your fingers.
Half a teaspoon of filling is placed onto the square and then it is folded into a triangle and the edges sealed. The two ends at the folded side of the triangle are brought together and pinched together giving a shape which is slightly rounded triangle with a pointed part.
They are cooked just as the pierogi in boiling water with the addition of salt and oil.
I serve them with melted butter.
If you are going to add them to soup do not coat them with butter – 2 to 4 are added to each serving.
Our New Tradition
After the Wigilia meal on Christmas Eve we always leave some uszka for the Christmas Day breakfast and we have fried eggs, grilled bacon with fried uszka – delicious!
PS
This must be my longest post as there is so much to say – I have only touched on the fillings that you can use & you can always make up your own.
Naleśniki are thin pancakes like the French crêpes. Their name comes from the Polish verb to pour.
In Poland pancakes are eaten all year round, with either savoury or sweet fillings, and not just before Lent. (In fact pancakes are not amongst the special foods eaten before this time of fasting).
We used to have then about once a week but I never seemed to have been involved much in their making except for spreading the fillings on, so when I started to make them myself I had lots of disasters!
My pancakes were always a bit hit and miss. Often the constancy was not constant nor the thickness and nearly always the first one of the batch would stick to the pan and have to be thrown away.
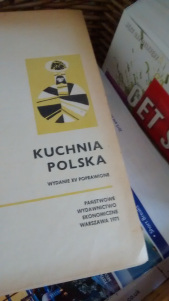
Then I looked up the recipe in my old Polish cookbook, made a few telephone calls to various relatives and also followed Delia Smith’s advice and bought a special frying pan which I use only for pancakes.
Kuchnia Polska – 15th Edition 1971
So I now I think I know the secrets of making perfect pancakes and these I will now pass on.
Sift the flour
You must use a mixture of milk and water – 50/50 is the best – this ensures that the pancakes do not burn as easily and also enables you to make then very thin and elastic so they are easy to work with. (This is the most important tip).
Beat the eggs and add then them first to the sifted flour.
Add the milk mixture to the egg and flour mix until you have a batter the consistency of pouring cream.
Leave the batter to stand for at least 1 hour in which time it will thicken, then add a little more liquid.
Use a special thin pan which you use just for pancakes, mine has a base diameter of 20 cm and is made of steel, once seasoned, just wipe it clean between uses with kitchen roll – never scour it or use detergent.
Work out how much batter you need for a pancake and find a measure which will then give you a consistent amount – I use a small ladle which holds 45ml.
Have a dish of melted butter or margarine and sunflower oil for frying so you can add just enough and tip some back if needed.
Ingredients
200g plain flour
2 eggs
200 ml milk (full or semi-skimmed)
200 ml water
pinch of salt
This amount makes around 8 pancakes.
I remember this recipe as it is all the 2’s for ease, but it will depend on the flour and the size of the eggs, you might not use all the milk & water mixture or you might just need a little more.
Heat the pan – you want a high heat but not too much to burn the pancakes – you will find you have to keep adjusting the heat. (As I cook using gas this is easy to do).
Pancake Batter & Ladle
Using the ladle pour the mixture into the pan.
Tilt the pan so that the mixture covers the surface completely and evenly.
Cook the pancakes on one side and turn then over (or toss them English style), you can make them up one by one or stack then up with a piece of greaseproof paper in between them. You can do this and leave then for later use
There are many recipes for pancake fillings both savoury and sweet.
I think the 2 most popular sweet fillings in Poland are sweet curd cheese (see a previous post) and stewed apples with cinnamon.
Pancakes with sweet fillings are normally folded into triangles – fan -shaped by folding the pancake into half and half again.
Pancakes with savoury fillings are normally rolled up and often then put in a dish, topped with a sauce or grated yellow cheese and put in the oven for a time.
In these instructions I have used photographs of pancakes being made with the sweet curd cheese filling.
Frying the PancakeSweet Curd Cheese FillingSpread with FillingFolded in HalfAnd Half AgainDusted with Icing Sugar
I find two are enough for me!
You can make the filled pancakes in advance prior to dusting them with icing sugar and then heat them up on both sides – using the pancake pan again – maybe with the addition of a little butter. Then dust them with icing sugar.
This sweet fresh curd cheese mixture is one that is used as a filling for pancakes in Poland.
You can make this mixture with twaróg – curd cheese, cream cheese or yoghurt cheese.
Use 1 packet of cheese, usually 200g – 300g , to this add 2 to 3 tablespoons of soured cream and 2 to 3 tablespoons of icing sugar and mix this together till you get a smooth mixture. You can add 2 to 3 drops of vanilla essence. Do not add too much sugar – you want the contrast of sweetness & sour.
Sweet Curd Cheese MixturePancake Spread With Sweet Curd Cheese MixturePancakes Folded Polish Style with Sweet Curd Mixture Dusted with Icing Sugar
Twaróg – Polish Curd Cheese is used extensively in cooking and finds its way in many guises onto the Polish menu, especially at home, both in sweet and savoury dishes.
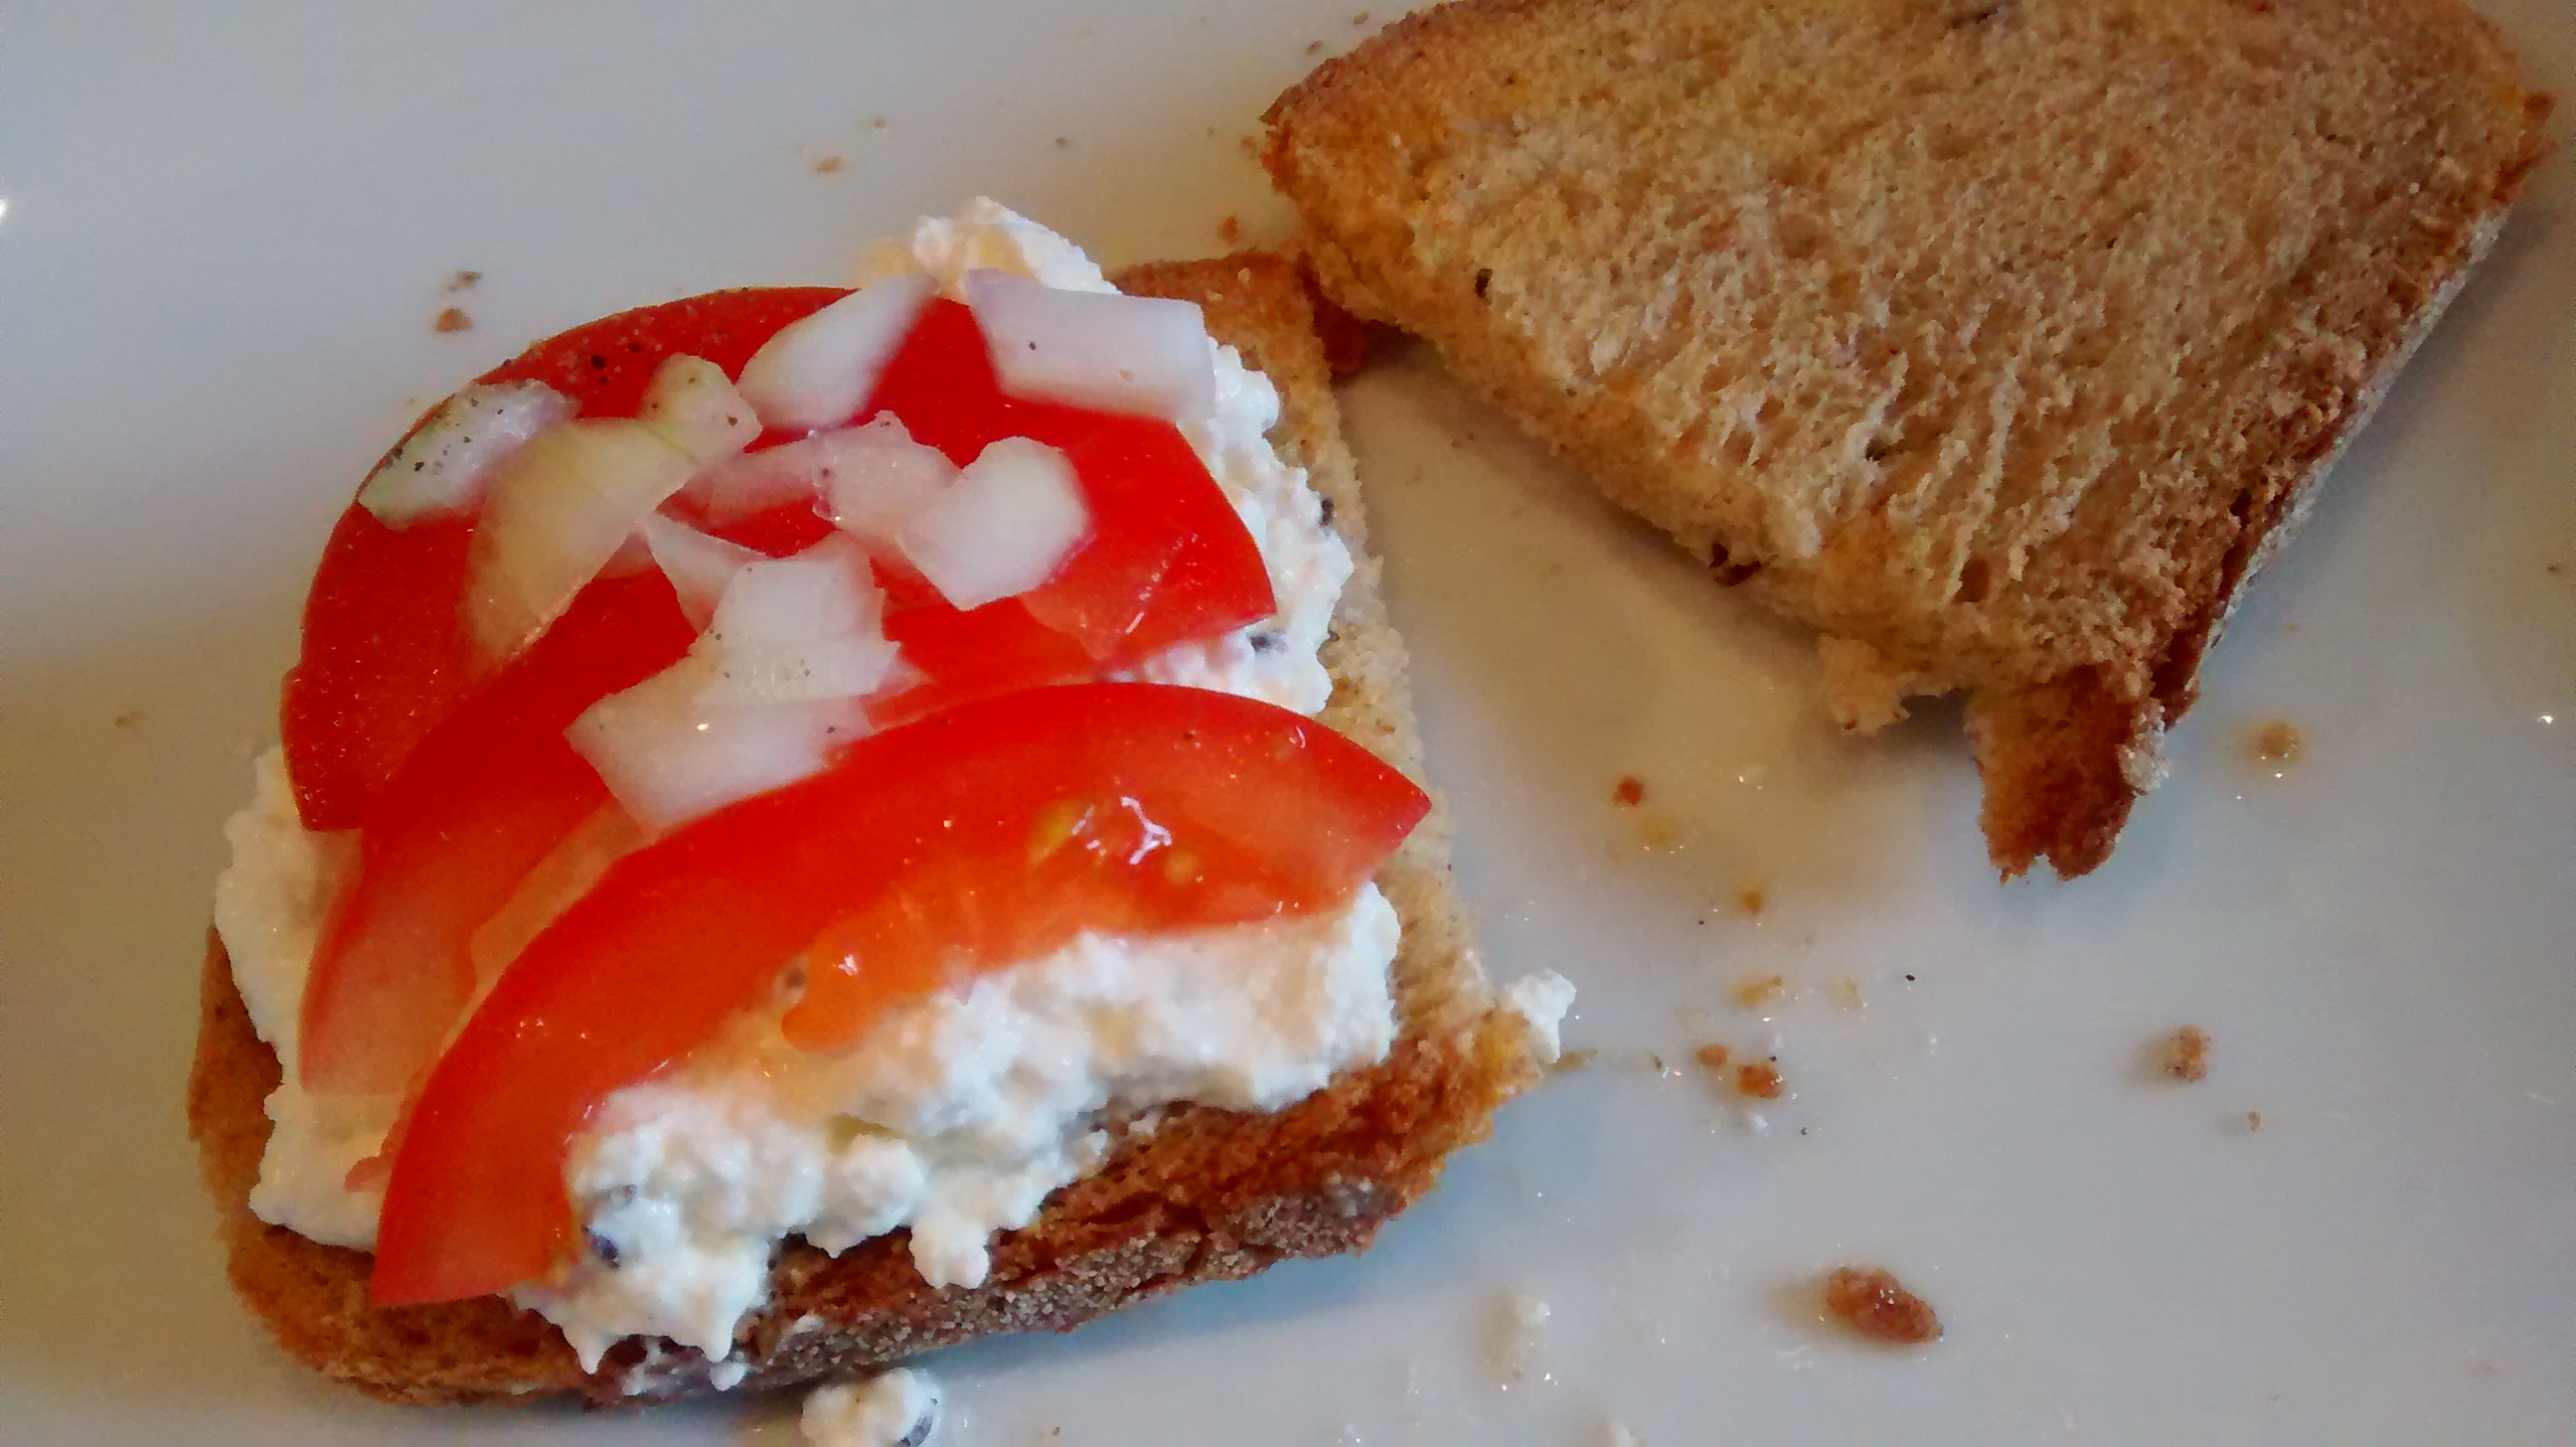
The following are what I consider to be popular classic savoury fresh cheese mixtures and are often served for breakfast with bread and salad.
Here in England I think they could be served at lunchtime. As well as with bread and rolls they can be served with crisp-breads, oatcakes or crackers.
3 Classic Curd Cheese Mixtures
You can make these with Twaróg – Curd Cheese or with Cream Cheese.
You can also use yoghurt cheese – (Look out for a post on how to make this later).
The amounts used are just approximate, using one packet of cheese, which is normally around 200g – 300g, for each mixture and can be varied to taste.
If using curd cheese, add a pinch or two of salt and a couple of spoonfuls of soured cream, mix together until smooth.
If using cream cheese just take it out of the packet and mix it in a bowl – you can add a spoonful or two of soured cream to make it a softer consistency if you wish.
Mixture 1
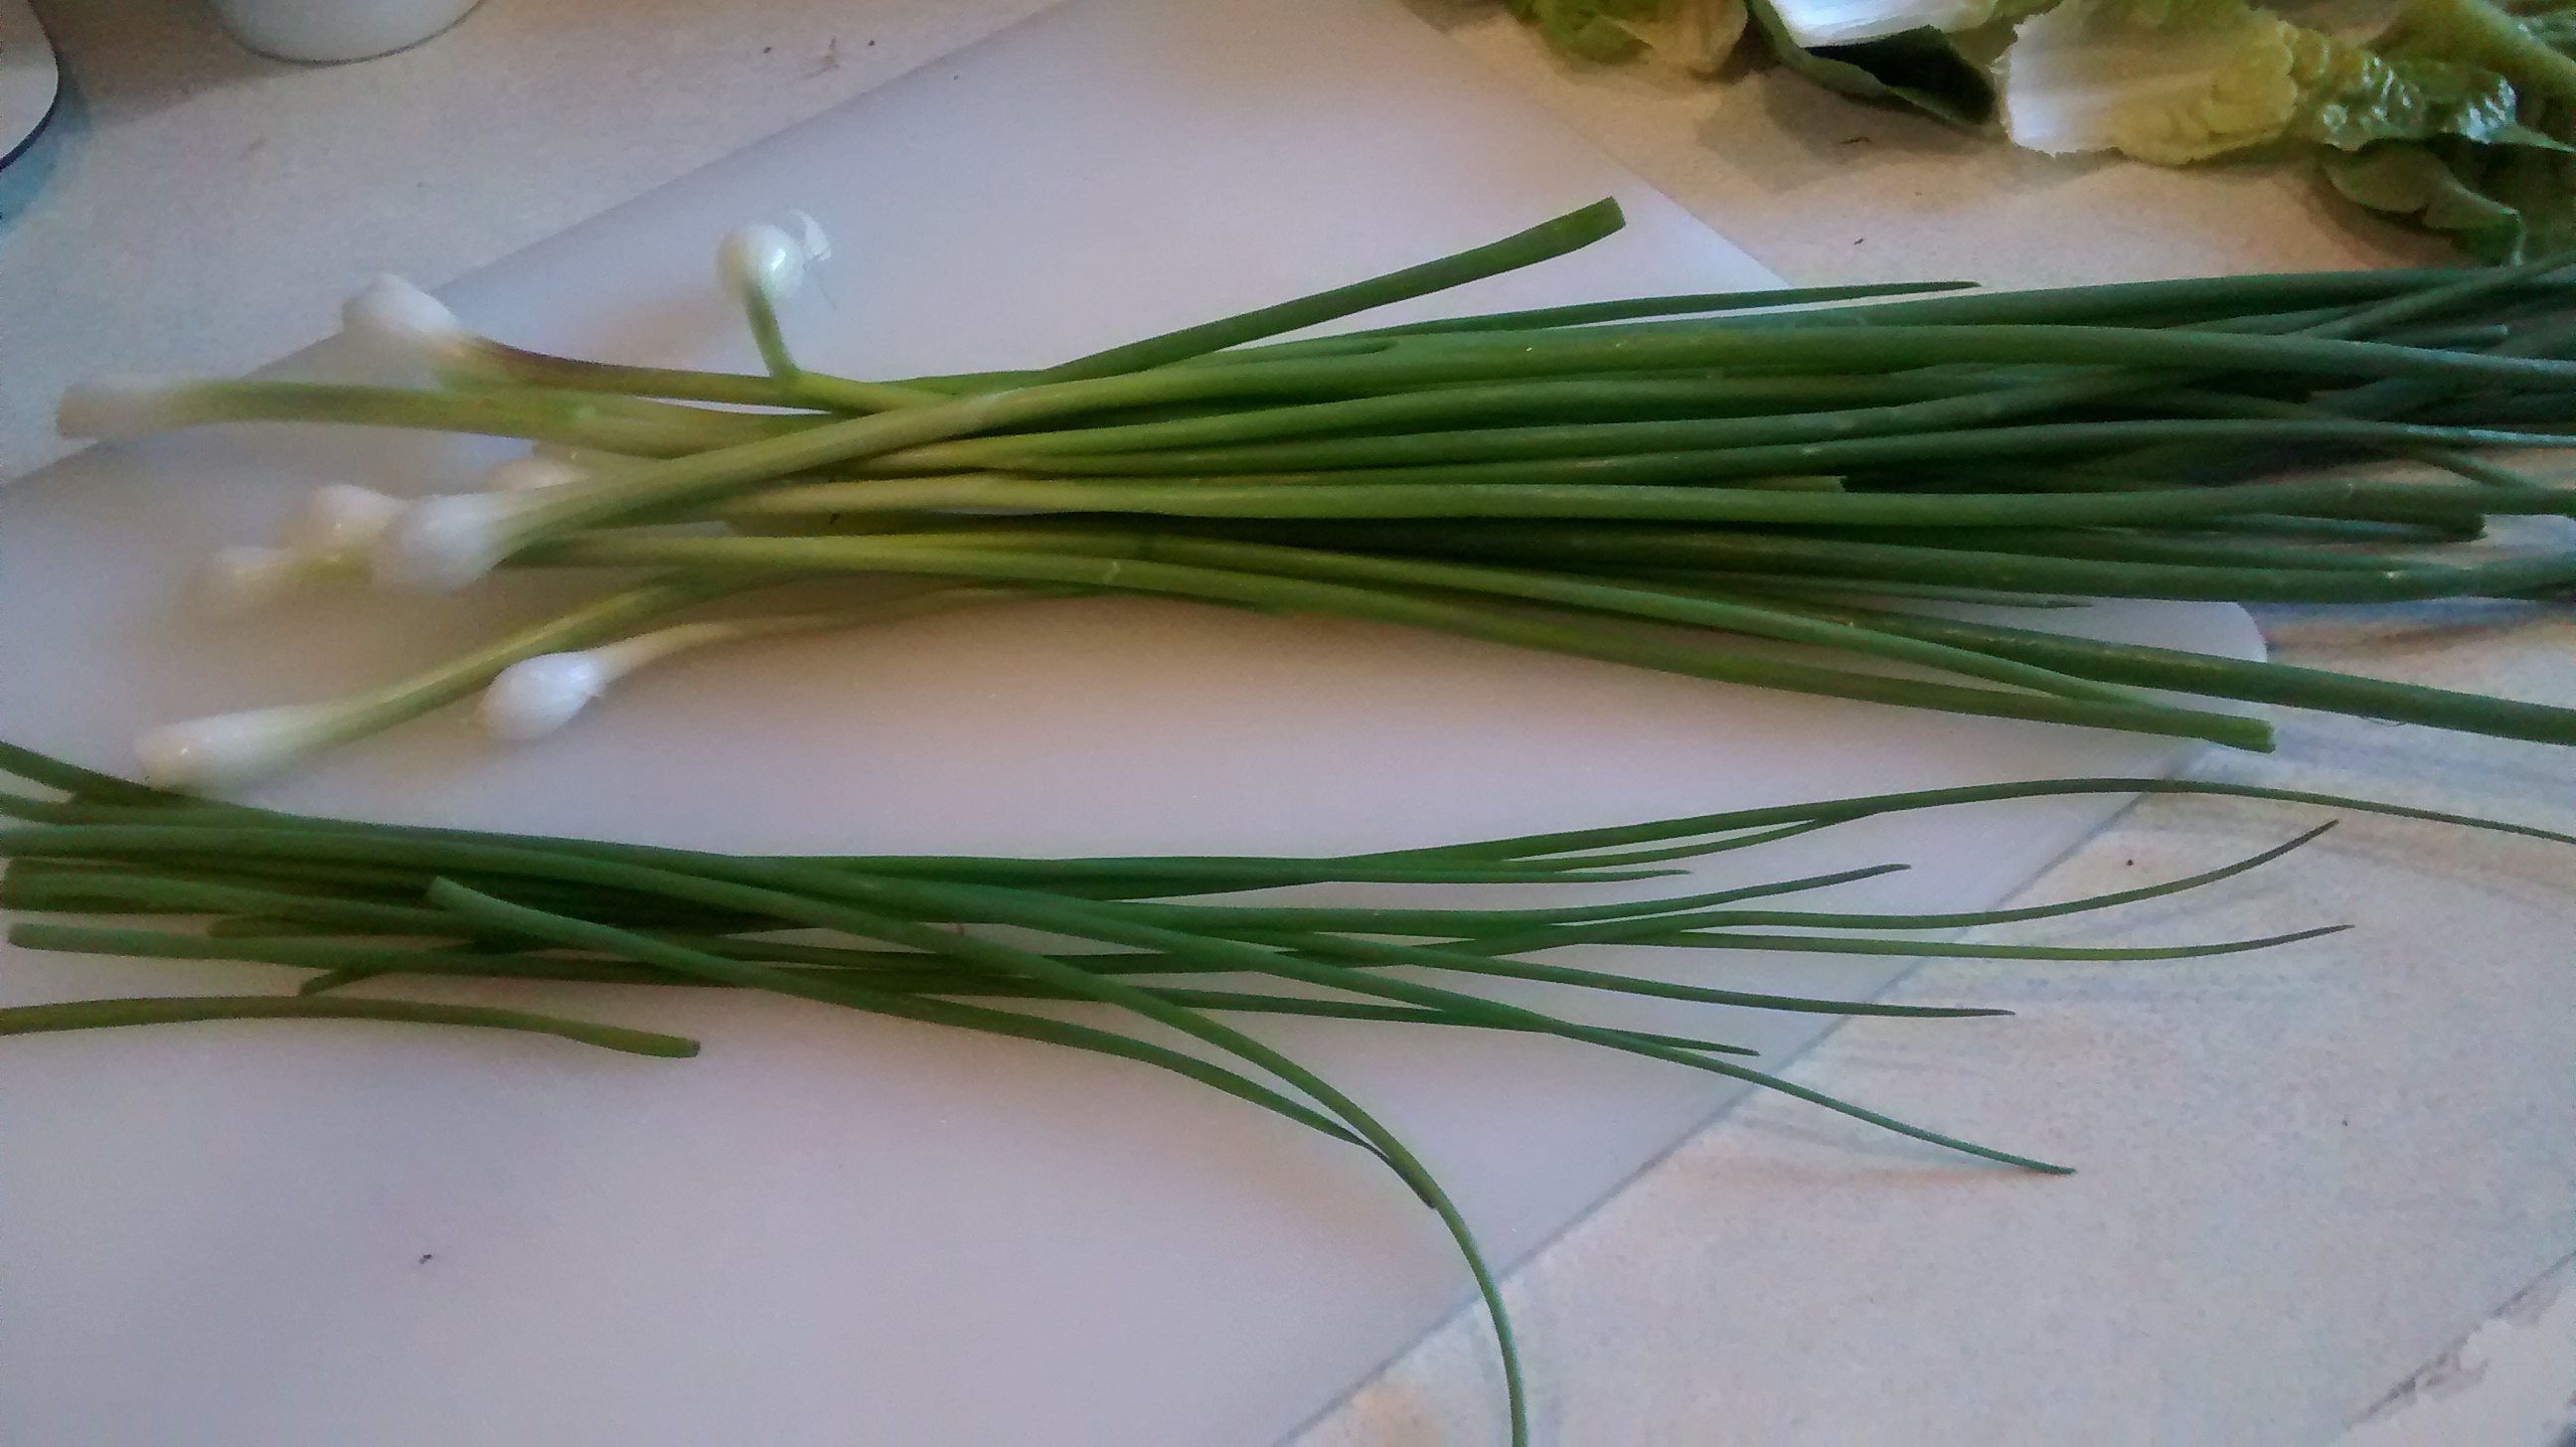
To the cheese add a few tablespoons of finely chopped chives or the green parts of spring onions.
In Poland szczypiorek (which in dictionaries is given as chives) would be used – however I think it is slightly different and is much larger than the chives I grow here in England.
Chives Growing in a Pot
Spring Onions and ChivesCurd Cheese and Chives
Mixture 2
To the cheese add a couple of teaspoons of caraway seeds
Curd Cheese and Caraway Seeds
Mixture 3
To the cheese add some chopped gherkins
I find these are the best gherkins to use as they are not vinegary.
Chopped GherkinsCurd Cheese and Gherkins
Typical Polish Breakfast Fare
These cheese mixtures can also be served with bliny -little buckwheat pancakes. (Look out for a a post on how to make these later).
Baked cheesecakes have a very long history with the Ancient Greeks baking them with cheese and then the Romans adding eggs to the recipes.
Varieties of cheesecakes were made in the Middle East and mentioned in the Old Testament. Maybe a land flowing with milk and honey is so good as these are ingredients needed to make a cheesecake!
The traditional cheesecake in Poland is a baked cheesecake and it is found in Christian and Jewish Traditions.
One story is that King Jan III Sobieski brought the recipe back with him after his victory against the Turks at the Battle of Vienna (1683).
This could tie up with the fact that one version of the cheesecake in Poland is called Viennese – Style.
When immigrants to the United States of America from Poland, Russia and Germany took their recipes with them in the 19 Century we eventually got the New York Cheesecake.
As ser is the Polish word for cheese – we get sernik as the Polish word for cheesecake.
Cheesecakes are made from twaróg – curd cheese, eggs and sugar and how they turn out depends not only on the proportions of each but also the cheese that is used. Butter and soured cream may also be used.
My mother used to make her own curd cheese from fresh farm milk that was allowed to sour and then the solid curds were separated from the whey by pouring the soured milk into a muslin cloth and leaving this to drain.
Unfortunately you cannot make soured milk from pasteurised milk.
Recently I have been making my own yoghurt and yoghurt cheese. You have to use a live yoghurt starter with pasteurised milk. This is very similar to twaróg, not identical but very near. The result tastes wonderful but it takes a lot of time and effort to get enough cheese at home and so the following recipes use bought cheese.
You can find twaróg now in Polish shops and some supermarkets and sometimes under its German name qwark.
Twaróg – Curd Cheese
Previously as the curd cheese was not available my recipes have been adapted to use a Philadelphia ™ style cream cheese.
Philadelphia ™ is a cream cheese invented in 1872 in New York State.
Full fat makes the best cheesecake. You can use a mixture of full fat and medium fat but never use low fat cheese.
You cannot make a good baked cheesecake from low fat cheese.
Curd cheese is slightlygrainyand to get the best results you either need to put it through a mincer or use a blender.
A traditional baked cheesecake has 2 layers – a cake base and then the curd cheese layer on top.
In my mother’s original cake the cheese mixture was poured over a baked cake base but for ease I often use a crushed biscuit base.
Mama’s Cheesecake
Biscuit Base Ingredients
75g melted butter
150g digestive, rich tea or morning coffee biscuits
You need a round tin with a loose base or a spring form tin or you will not be able to get the cake out. I always use an anodised aluminium tin, 23cm in diameter and 7 cm deep, which does not rust.
Selection of my anodised cake tins
Grease the tin well with butter.
Crush the biscuits to make fine crumbs and use some of these to coat the sides of the greased tin.
Crushed biscuits
Add the melted butter to the rest of the biscuits and mix together. Put this mixture onto the base of the tin pressing it down firmly.
Biscuit crumb mix – pressed into the tin
Leave the tin in a cold place whilst you make the cheese mixture.
Cheese Mixture Ingredients
700g of curd cheese or cream cheese (at room temperature)
6 egg yolks
2 egg whites
4 tablespoons of caster sugar
50 to 75g of melted butter
3 drops of vanilla essence
1 to 2 tablespoons of semolina (optional)
Pre heat the oven to GM4 – 180oC.
In a large bowl beat the yolks and sugar until they are thick and creamy – the mixture should be lighter in colour than the original yolks and be creamy. (This may take around 5 minutes). Then add the cooled melted butter, cheese and vanilla essence.
If using the semolina, add this now – it makes the cake a bit denser. (I rarely add this with cream cheese, more often with curd cheese).
Beat the whites with a whisk until you have soft peaks and fold these into the mixture.
Pour the mixture on top of the biscuit base and bake for 1 to 1 ¼ hours. Check after an hour, if the top starts to get too brown before the cake is cooked place a piece of foil over the top.
Once the cake is cooked switch off the oven, you can leave the door open slightly and let it cool down in the oven, this prevents it sagging and cracking too much as it cools. (It will sag and often does crack – this is not unusual).
Once the cake is cool you can take it out of the tin. I use a tin can and put the cake tin on this and slide the side of the cake tin down.
Dust the top of the cake with icing sugar before serving.
This cake tastes best if allowed to get cold, so make it the day before it is needed.
Variations
You can make endless variations on this basic recipe by adding raisins, mixed peel, fresh raspberries and so on or adding a drizzle of melted dark chocolate on the top when it has cooled.
In Poland one type of cheesecake is described as Vienneseand another as fromKraków. The Viennese one has sultanas or raisins and orange peel in the cheese mixture and sometimes some chocolate on top, whilst the one from Kraków is traditionally baked in a square or rectangular shape and has a lattice of pastry over the top and will also have sultanas or raisins in the cheese mixture.
Cheesecake Version 2
I cannot quite remember the origin of this version, I think my mother got it either from one of her friends or from the Polish newspaper. It has soured cream as one of the ingredients but no butter. It uses all the egg whites which are stiffly beaten causing this cake to have a lighter texture and it rises more but does sink down again as it cools.
The instructions are the same as the one above for the biscuit base. It is the cheese mixture which is different
Cheese Mixture Ingredients
600g curd cheese or cream cheese (at room temperature)
100g caster sugar
6 eggs separated
120 mls soured cream
grated rind of 2 lemons or 3 drops of vanilla essence
Pre heat the oven to GM4 – 180oC.
In a large bowl beat the yolks and sugar until they are thick and creamy, add the lemon rind (or vanilla essence), soured cream and cheese.
In another large bowl whisk the whites till they are stiff and fold these into the cheese mixture using a metal spoon.
Pour the mixture on top of the biscuit base and bake for 50 minutes to 1 hour. Check after 50 minutes if the top starts to get too brown before the cake is cooked place a piece of foil over the top.
Once the cake is cooked switch of the oven, you can leave the door open slightly and let it cool down in the oven, this prevents it sagging and cracking too much as it cools.
Once the cake is cool you can take it out of the tin. I use a tin can and put the cake tin on this and slide the side of the cake tin down.
Dust the top of the cake with icing sugar before serving.
This cake tastes best if allowed to get cold, so make it the day before it is needed.
The origins of cheese pre-dates recorded history but one of the earliest archaeological evidence of cheese production in 5,500 BC is from Kujawy in Poland.
Seris the Polish word for cheese.
Unlike in France, Poland does not have dozens of varieties of cheese.
There are basically three types of cheese in Poland – white, yellow and smoked.
White cheese is made from curd cheese.
Twaróg is the name for curd cheese and is the most important cheese for cooking in Poland both for savoury and sweet dishes.
It is often known as ser wiejski – village cheese.
This is the cheese that both sets of my grandparents would make on a very regular basis.
Twaróg
Twaróg is made from soured milk and can be classified as a fresh acid-set cheese or as a fermented milk product. The soured milk is poured into muslin clothes and then hung up to separate the solid curds from the whey. This results in the traditional wedge shape.
Rennet is not used in its production.
In German it is called Qwark, in Dutch it is called Kwark and is similar to the French Fromage frais.
It is similar to yoghurt cheese which is made from strained yoghurt.
Science note
Soured milk and yoghurt are both produced by the action of bacteria in milk.
However it is mesophile (moderate temperature loving) bacteria which produce soured milk and thermophile(higher temperature loving) bacteria which produce yoghurt. What that means is that soured milk is naturally prevalent in cooler climates than yoghurt.
Historical note
There is evidence of soured milk production in 10,000BC and yoghurt production in 6,000BC.
Twaróg is used extensively in Polish cookery both savoury & sweet.
Recipes using Twaróg will feature in many of my future posts.
Yellow cheese is hard cheese and although there are several varieties they are very much like the Dutch cheeses such as Edam and Gouda.
Smoked cheese – the most famous is from the Tatra Mountains and it is made from sheep’s milk – it is called Oscypek.
This cheese has been made from the 15th Century.
The curds are pressed into wooden decorative shapes.
It has a protected trade name under the EU’s Protected Designation of Origin.
Some scenes of the Tatra Mountains
Zakopane is a much visited town in the Tatra mountains. Its name means dug in and it is in at the bottom of a valley surrounded by mountains.
Wooden houses typical of Zakopane
Oscypek – smoked cheese – from the Tatra Mountains – is often served grilled with cranberry or lingonberry jam.
Oscypek for sale in the streets of Zakopane
Lady selling Smoked CheeseSmoked Cheese made with Sheep’s MilkSome cheeses are made with Goat’s Milk
Górale – Highlanders – Shepherds from the Tatra Mountains
Folk DancingFolk Dancing
World Cheese Production
Some Very surprising Statistics
If anyone had asked me about world cheese production before I started this post, I would have guessed that the biggest producer in Europe was France or maybe The Netherlands. I would have been very wrong!
Looking at the figures for 2011 & 2013 for World Cheese Production in metric tonnes I found that –
The top 6 in both these years are as follows:
United States of America
Germany
France
Italy
Netherlands
Poland.
Also the United Kingdom does not feature in the top 10 at all.
Thinking about this, I of course realised that here in The United Kingdom many of the cheeses for sale are imported many from France and The Netherlands.
In recent years Polish cheeses are appearing not only in the many Polish shops in the United Kingdom but also in some of the regular supermarkets.












 Journey From A Polish Kitchen