Another Cheesecake!

I had not planned to write about cheesecakes again so soon but recently I had made lots of yoghurt cheese and I decided to make a baked cheesecake for my visitors.

There are so many variations you can make of baked cheesecakes – here is one with a chocolate and an orangey twist.

sernik3


I had a packet of milk chocolate digestive biscuits already opened and  I thought I would try  a variation on my usual recipe.

Ingredients for the base

  • 100- 150g of chocolate digestive digestive biscuits (milk or dark)
  • 50 – 75g of butter
  • A few chunks of dark chocolate

Method

  • Grease a spring-form or loose bottomed tin with melted butter. (You can use a 19cm, 20cm or 22cm tin – adjust the amounts of the base ingredients to suit.)
  • Crush the biscuits in a bowl.
  • Melt the butter in a pan over a low heat then add the chocolate and let it melt.
  • Add the butter & chocolate mix to the biscuits and mix them all together.
  • Press the mixture into the base of the tin and leave it to cool completely.
  • Once cool you can put it the tin into the fridge whilst you make the yoghurt cheese mixture.

Ingredients for yoghurt cheese mixture

  • Around 450g of yoghurt cheese (or use cream cheese)
  • 3 eggs separated
  • 80g of caster sugar
  • 60g of chopped mixed peel (I use the peel from Marks & Spencer)
  • 2 tablespoons of custard powder

Custard 1


The custard powder helps as the yoghurt cheese is often quite “wet” – this is a tip I got from the book   Eat Well  The Yochee Way   by Nikki & David Goldbeck.

IMG_20160723_173617216(1)


Method

  • Pre-heat the oven to GM 3 – 160ºC.
  • Whisk the egg yolks and the sugar till they are pale and fluffy.
  • Lightly whisk in the yoghurt cheese and the custard powder till it is all well combined.
  • Mix in the mixed peel.
  • Whisk the egg whites until they are stiff and then fold them into the mixture with a metal spoon.
  • Pour the mixture onto on the biscuit base.


  • Bake in the oven for  50 minutes.
  • When the cake is ready switch off the oven and leave it in there for at least 40 minutes.
  • Take out the cake to cool.
  • Once it is cold – take the cake out of the tin by loosening the outer ring or placing the cake tin with the loose bottom on a tin can and sliding the cake tin down.
  • Dust the cake with icing sugar before serving.
  • I think this cake is best made the day before you want to serve it – so it is well cooled and set.


The blue & white table cloth is a new 100% cotton one from Ikea.

The tea plate is Las Palmas by Aynsley from the 1960s.

Kołaczyki – Little Wheels

Sweet Yeast Buns

Kołaczyki means little wheels from the word koła which means wheels.

In a previous post –  Bułeczki – Sweet Yeast Buns– I gave a recipe for basic sweet yeast dough – since then I have tried out a slightly different recipe – nearly the same ingredients but a slightly different method – and I think these turned out to be the best yeast buns I have ever made – so this is  – Basic sweet yeast dough version two. 

A few reminders when using yeast in baking

  • Learn to be patient – you cannot control the timings exactly with yeast, it depends on the temperature of the room and the flour used and other variables.
  • Do yeast baking on a day you are planning to be in & have other things to do, but ones you can break off from when needed.
  • Heat the milk so it is at body temperature – use the finger test – too hot and you will kill the yeast – too cold is okay – it will just take longer.
  • An egg glaze often burns too quickly –  I have found an egg white or egg white & water glaze gives a better result.

Older Polish recipes use fresh yeast. I have used dried yeast and have had very good results.  (I have not tried using easy bake yeast for this recipe).

Basic Sweet Yeast Dough Version 2

Ingredients

Leaven – Starter

  • 100g plain flour
  • 30g fresh yeast or 15-20g dried yeast
  • 125ml  milk

Rest of ingredients

  • 3 egg yolks
  • 60g sugar
  • 50g melted butter or block margarine
  • 400g plain flour
  • 1/4 tsp salt
  • Zest of 1 lemon
  • 2-3 drops of vanilla essence
  • 125ml milk

and

Save 1 egg white for use as a wash on the buns.

Method

  • Warm the milk slightly – so it is just warm to the touch – and add the yeast and mix together.
  • Put the flour in to a bowl and add the milk and yeast  mix it all together and leave it covered until it is double in size.
  • *
  • Melt the butter and leave it to cool.
  • *
  • Whisk the yolks and sugar until they are pale and fluffy.
  • Grease 2 baking sheets – You should get around 15 buns. – invite people round!
  • Into a large bowl put: the flour and the salt, the yeast starter, the yolk mixture, the zest of a lemon, the vanilla essence and the milk.
  • Mix it all together so that you get a soft dough that comes away from the side of the bowl – you do not have to knead it.
  • Then work in the melted butter (this is the hardest part) until it is all incorporated and you have a uniform shiny dough.
  • Cover the dough with a cloth and leave this to rise until it is double in size.
  • Onto a floured surface place the dough and form it into a rectangle and then roll this out until it is around  2cm thick.
  • Using a 8cm diameter cutter cut out circles of dough and place them on the greased baking sheets, leaving room for the dough to rise.
  • Gather together the left over dough and repeat the process.
  • Cover the trays and leave the circles to rise and double in size.
  • Pre heat the oven to GM5 – 190ºC
  • Use a clean napkin or tea towel and cover the base of a tumbler.
  • Use the covered tumbler and press down on the centre of each circle to form an indentation into which you will put a filling.

Fillings

  • These are the ones I tried –
  • Cheese mixture – similar to ones for baked cheesecake.
  • Mix together around 250g of cream cheese/twaróg/curd or yoghurt cheese, 70g icing sugar, 1 egg yolk and 2-3 drops of vanilla essence.
  • Blackcurrant jam (you could use any tart jam such as cherry or gooseberry )
  • English style sweet mincemeat – I use Delia Smith’s recipe (without the nuts)
  • Put a large dollop of the filling onto each circle.

Brush the exposed dough with beaten egg white.

IMG_20151218_075301762

Topping

This is for the jam or mincemeat only – not the cheese mixture.

Kruszonka – Crumble Mixture

Ingredients

  • 50g plain flour
  • 50g butter
  • 50g granulated  sugar

Method

  • Mix together the flour and butter to make fine crumbs then mix in the sugar.
  • Sprinkle around a tablespoon or so over the jam or mincemeat.
  • Bake the buns for around 15 minutes.

Tea plate pattern below is called Mayfair.

They were all delicious – the sweet cheese ones were my favourites!

Yoghurt and Yoghurt Cheese

Soured Milk – is the fermented milk product that is found in Northern Europe, especially in Poland.  It forms naturally from bacteria in fresh milk  and these bacteria live happily in colder climates.

When we used to have farm milk at home my mother made soured milk all the time and then also made twaróg – Polish curd cheese from this. However you cannot make soured milk from pasteurised milk (of course you can in a dairy where they will have the starters).

My mother had this on the go all the time, mainly to make the curd cheese which is used in lots of Polish recipes – savoury and sweet.

Yoghurt – is the fermented milk product that is found in Southern Europe and the Middle East.  It forms naturally from bacteria in fresh milk and these bacteria live happily in warmer climates.

You could say that yoghurt is soured milk’s cousin.

It is a relatively new dairy product for sale in Poland but is now very popular.

You can make yoghurt at home because you can use some bought yoghurt as a starter and then continue using your yoghurt as a starter and so on.

I go through phases of making yoghurt – it is easy to do – you just need a little bit of time and a supply of milk and some bought yoghurt as a starter.

Two Very Good Books

The Yoghurt Book Food of the Gods by Arto der Haroutunian – first published in 1983.

Mine is an old copy.  I think it might be out of print but there are second hand copies available for sale  eg on Amazon.

IMG_20150820_130633993_HDR

Eat Well The YoChee Way by Nikki & David Goldbeck – 2001

This book is American & YoChee is the authors name for yoghurt cheese.

My Method For Making Yoghurt

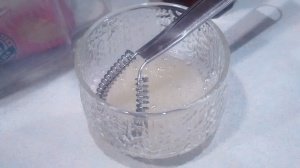
  • I use a wide-necked vacuum flask, it holds about 750 ml (it must be wide necked or you will have difficulties cleaning it). I fill it with boiling water to sterilise it and heat it up. I leave this with the water in whilst the milk is cooling down – then I pour out the water and add the yoghurt mix.  I often make this at night and it is ready  in the morning. You can make it in the morning and it should be ready in the evening.

IMG_20150820_172311670_HDR

IMG_20150820_172457892_HDR

  • Now that milk is pasteurised you need a yoghurt starter, Greek yoghurt is good, once you have made some of your own, you can then use that to start the next batch.
  • You need milk –  you can use whole milk or semi skimmed – you can use skimmed milk but I prefer the others.
  • I have a tall milk pan which is very useful as there is height for the milk to rise without spilling all over the cooker top.

IMG_20150820_172443217

IMG_20150821_065533717

  • Bring the milk to the boil and then let it cool to 37 to 40 degrees o C, if you dip in a finger tip it must feel just lukewarm, no hotter than body temperature, and you should be able to keep your finger there for a count of 10 without it being too hot or you can use a cook’s thermometer.  This is important, too hot will kill the bacteria, too cold may not be warm enough for the bacteria to grow.
  • Mix a large tablespoon of yoghurt into the milk, about 1 tablespoon to 500ml of milk.
  • You then have to leave the mixture in a warm place to grow.
  • You can put the mixture in a clean, sterilized with boiling water, bowl and cover this with a cloth and leave it overnight  or about 12 hours. This is the easiest method in the summer or if you have a warm but not too hot spot in the house.
  • I empty the hot water from my vacuum flask and pour in the milk & yoghurt mixture,  put on the stopper and the lid and leave for around 10 hours.
  • I have used a thermostatically controlled yoghurt maker in the past and you put the mixture into little pots and left them.  I found this did not make much yoghurt in one go and there was a lot to clean out and sterilise. I started to use the vacuum flask method and have stayed with that but some of the new electric makers now have just one large pot and I think they may be easier to use.
  • Once it is made, pour it into a bowl or tub and refrigerate the yoghurt,  it tastes so much better and fresher that any bought ones.  I bought some plastic food storage tubs with lids specially for this.

IMG_20150821_195612349

IMG_20150821_195619431

IMG_20150821_200010145

IMG_20150821_200029097

At this point you can start again and when you have loads you will start to think “maybe I will make some yoghurt cheese from this” and on it goes!

With the yoghurt, sometimes I eat it plain, or use it instead of milk with muesli or other cereals, dried fruits and nuts. Mostly though I add fruit to it, chopped fresh fruit sprinkled with a bit of icing sugar, stewed fruit or tinned fruit. I love it with stewed prunes! It is super with just a spoonful of runny honey.  Sometimes I use it as a salad dressing on its own or mixed with mayonnaise.

Making Yoghurt Cheese

Also known  as YoChee  and in the Middle East as labna  or labneh.

Traditional Method

The yoghurt cheese is made by putting  yoghurt into a muslin cloth and tying it up and letting the whey drain off from the curds. This will take many hours and is best done in a cool place.

Modern Straining Method

I bought a little device from Lakeland Plastics which is a modern version of the hanging muslin cloth. It is a plastic tub with a stainless steel fine mesh sieve which hangs in the box.  You then put on a plastic lid and then put the tub in the fridge.

I leave this to strain for at least 24 hours  – often up to 48 hours.

IMG_20150810_174108113

IMG_20150810_174023256

IMG_20150810_175127395

IMG_20150810_175121773

Sometimes I buy a 1kg tub of Greek yoghurt to make the cheese if  I do not have any of my own – this is more than enough for the tub.

Yoghurt Cheese as it comes out of the pot.

IMG_20150812_132707751

It is a soft, fresh tasting cheese.

I eat it uncooked either plain or with chopped onions, chives or garlic, with chopped dates and banana or jam and so on, the list is endless.

I use yoghurt cheese in Polish recipes instead of twaróg – Polish curd cheese  to make baked cheesecake or Polish style ravioli with either sweet curd cheese or savoury with potatoes, onions and curd cheese and much, much more.

I would use this home made cheese within a week as it does not of course have the shelf life of commercially, often vacuum packed, cheeses. 

This morning for breakfast I had some freshly made yoghurt cheese on toast with some morello cherry jam which my friend had made a couple of weeks ago from cherries growing on her allotment.

It was delicious!

IMG_20150822_103701019

IMG_20150822_103644690

IMG_20150822_103711426_HDR

The cheese is wonderful with other slightly tart jams such as blackcurrant or damson.

By the Way – Whey is a useful by-product

IMG_20150822_104418597

Tub of whey you can keep in the fridge.

The liquid whey that is in the bottom of the tub can be saved and used instead of water, milk or buttermilk in making scones and soda bread etc or you can add it to soups.